高效使用iTerm
iTerm
iTerm是Mac上最好用的终端app,即下即用:http://www.iterm2.com/。
对于它有哪些好用的功能,可以参看这里:https://www.iterm2.com/documentation-highlights.html
iTerm提供了很好的对于字体、颜色的自定义接口以及窗体等的边界访问,下面将会用到。
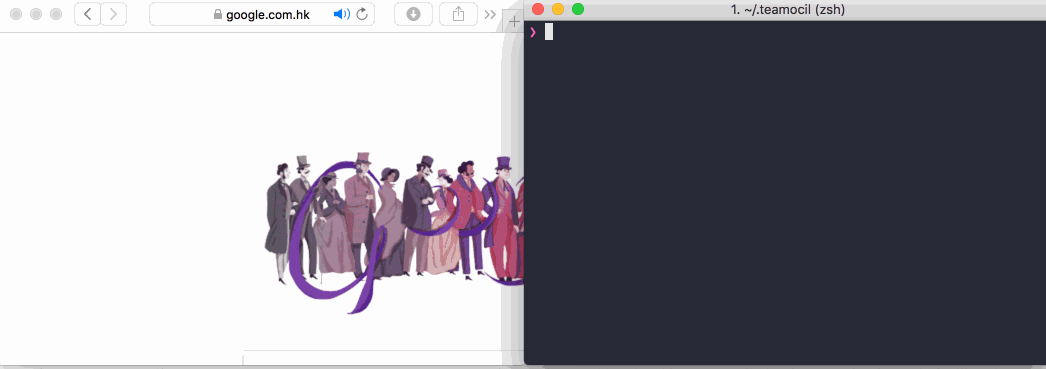
itermocil
这是一个iTerm的插件,因此不放到下面的插件部分了:https://github.com/TomAnthony/itermocil 。
它能干什么呢?看一下:
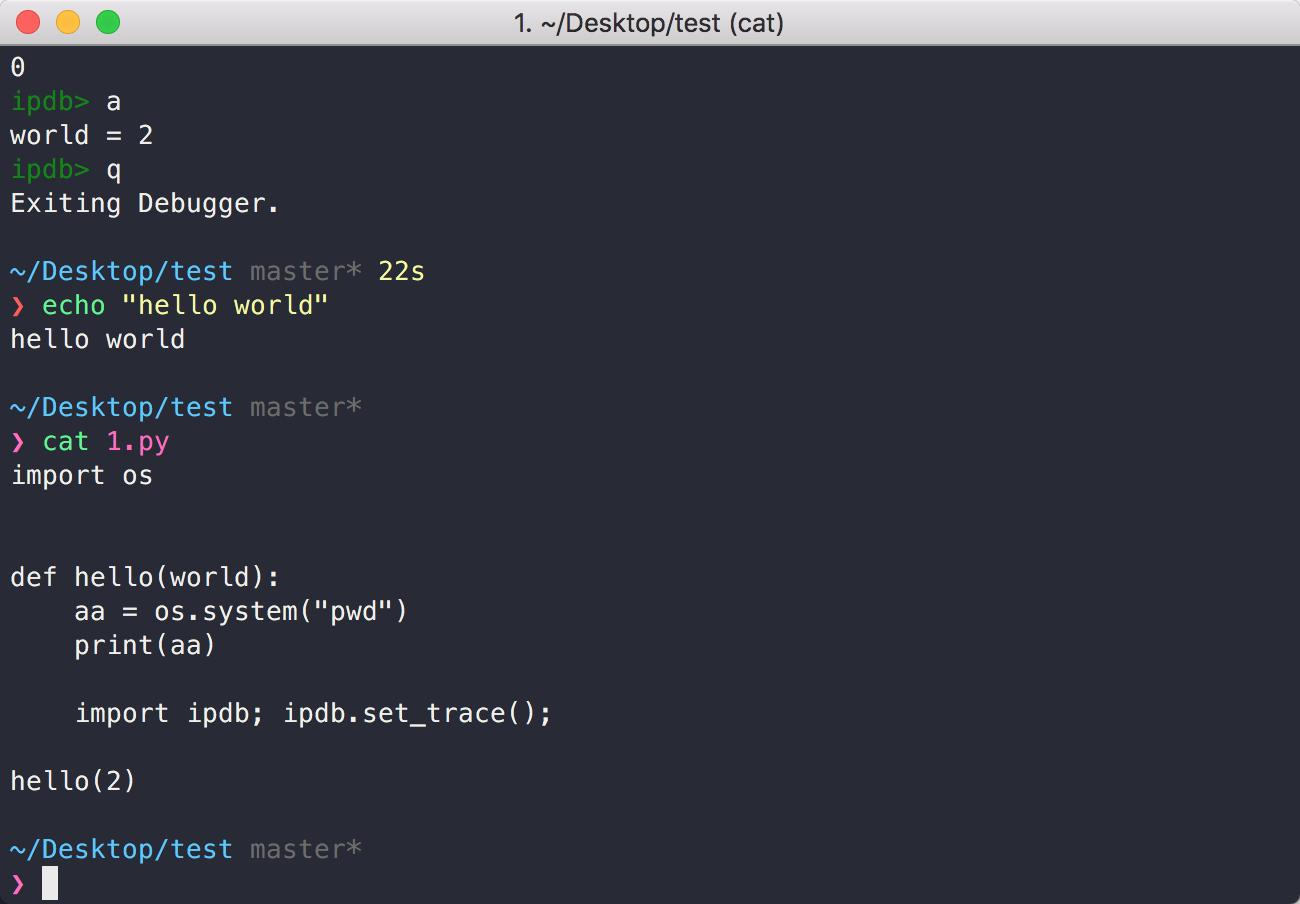
简单来说,就是一个iTerm的窗口管理器。实现上面的例子的代码大概是这样的:
windows:
- name: flask-layout
root: ~/work/git/ios_flask/app
layout: even-vertical
panes:
- commands:
- python3 hello.py
- commands:
- cd frontend
- npm run start
这在需要同时打开多个窗体的时候特别有用。具体配置还是看github上的文档。
zsh & oh-my-zsh
zshell(1990)实际上跟bash(1989)差不多老。bash的好处是Linux的默认shell,稳定普遍。zshell具有更好的扩展性,更好的交互特性。而且更重要的是,oh-my-zsh的存在使得zsh变得无比强大。
首先看一下我们系统里支持那些shell:
cat /etc/shells
当前的shell:
echo $SHELL
使用zsh作为默认shell:
chsh -s /bin/zsh
oh-my-zsh
Oh My Zsh,POWER OVERWHELMING!

sh -c "$(curl -fsSL https://raw.github.com/robbyrussell/oh-my-zsh/master/tools/install.sh)"
如果报错curl: (7) Failed to connect to raw.githubusercontent.com port 443: Connection refused,则按照这篇文章进行修复:
https://blog.csdn.net/xtyzmnchen/article/details/105707340
默认操作
有一些默认的操作需要记一下(s-super, c-ctrl, m-alt),具体名词就不解释了,试一下就知道什么意思:
| key | 功能 |
| s-d/s-D | Split pane horizontally/vertically |
| s-]/s-[ | Next/Previous pane |
| s-t | New tab |
| s-}/s-{ | Next/Previous tab |
| s-[number] | Switch to tab [number] |
| s-n | New window |
| s-w | Close current pane/tab/window |
然后是一些窗体内的操作:
| key | 功能 |
| s-=/s-- | Bigger/smaller font size |
| s-k | 清空窗口内容 |
| c-c | 终止 |
| c-n/c-p | 上一条/下一条命令 |
| c-r | Incrementally search command |
| c-a/c-e | 行首、行尾 |
| c-w | 删除最后一个单词 |
一些常被忽略的用法
- …
标准的返回上一层的指令为cd ..。而现在可以…..来返回上一层,两个点上一层,三个点上两层,以此类推。 - take
即mkdir & cd,例如take a == mkdir a && cd a 。 - 鼠标选中
鼠标选中则自动复制,不用再按s-c。 - 唤起
可以设置快捷键在任何地方唤起iTerm。
Preferences -> keys -> Show/hide all windows with a system-wide hotkey设置一个快捷键,例如"ctrl-super-,"。 - 时间戳
iterm的又一好用功能。View -> Show Timestamps,这时在屏幕右侧会出现每个命令的时间戳。 - 恢复窗口
一不小心把session关了,s-z重新打开。
配置
好的,现在材料已经备齐,开始配置。
zshell的配置文件在用户目录下,即~/.zshrc,用你喜欢的编辑器打开它。每次新建一个新的session时都会载入这个文件。
快捷键
绑定快捷键很简单,如下:
bindkey '^B' backward-word
bindkey '^F' forward-word
这两条就表示ctrl-b是向前退一个单词,ctrl-f是前进一个单词。不知道为什么这两个键不是默认的,手动设一下。
一些小的代码段
切换到Finder同目录:
df()
{
    curFinderDir=`osascript -e 'tell app "Finder" to POSIX path of (insertion location as alias)'`
    echo "\033[31m$curFinderDir\033[0m"
    cd $curFinderDir
}
切换到Xcode同目录:
dx()
{
    curXcodeProjectDir=`osascript -e 'tell application id "com.apple.dt.Xcode" to return path of document 1'`
    echo "\033[31m$curXcodeProjectDir\033[0m"
    cd $curXcodeProjectDir/..
}
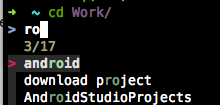
切换到Android Studio同目录:
# cd android
da()
{
    title=`osascript -e 'tell application "System Events" to get the {title} of window 1 of process "Android Studio"'`
    title=$(echo ${${title#*- \[}%\]*} | sed "s|^~|$HOME|g")
    echo "\033[31m$title\033[0m"
    cd $title/
}
theme
一个养眼的theme是必须的,例如这样子(sanzzy + Meslo 13 font + pure):
在我们的这个环境里,一个theme是由三部非组成的,分别是iTerm的colorthemes(.itermcolors)用来决定各种前景、背景色;字体;以及oh-my-zsh的决定各种行摆放位置的theme。
- iTerm的colorthemes可以在这里找到:https://github.com/mbadolato/iTerm2-Color-Schemes
- 字体在preferences -> Profiles -> Text -> Change Font 自己微调就好了。
oh-my-zsh的默认主题在其文件夹下的theme目录;在线预览:
https://github.com/robbyrussell/oh-my-zsh/wiki/Themes
第三方theme列表:
https://github.com/unixorn/awesome-zsh-plugins#themes
有的主题需要安装theme,例如powerline相关的theme都需要安装这些font: https://github.com/powerline/fonts ,然后在iTerm2的Preferences -> Profiles -> Text中同时将Font设置为Meslo LG M DZ Regular for Powerline即可。
插件
oh-my-zsh的强大之处就在于其插件系统,自带的插件在其plugins目录下;可以在这里看到文档:https://github.com/robbyrussell/oh-my-zsh/wiki/Plugins 。
除自带的插件外,还有很多geeks的第三方插件,这里有一个集合:https://github.com/unixorn/awesome-zsh-plugins 。
包管理
一个包管理器是必须的。
https://github.com/zsh-users/antigen
安装:
brew install antigen
然后可以新建一个.zsh_antigen,把下面的代码放进去:
source /usr/local/share/antigen/antigen.zsh

# Load the oh-my-zsh's library.
antigen use oh-my-zsh

# Bundles from the default repo (robbyrussell's oh-my-zsh).
antigen bundle git
antigen bundle z
antigen bundle python
antigen bundle pip
antigen bundle vi-mode
antigen bundle command-not-found

antigen bundle zsh-users/zsh-autosuggestions
antigen bundle zsh-users/zsh-completions
antigen bundle zdharma/fast-syntax-highlighting
antigen bundle changyuheng/zsh-interactive-cd
antigen bundle laurenkt/zsh-vimto
antigen bundle psprint/history-search-multi-word

# Load the theme.
antigen bundle mafredri/zsh-async
antigen bundle sindresorhus/pure

# Tell Antigen that you're done.
antigen apply
然后在.zshrc中添加一行
source .zsh_antigen
假如需要安装另一个默认插件,例如z:
antigen bundle z
如果要安装一个第三方插件(以及第三方theme),首先在github上找到它,例如https://github.com/laurenkt/zsh-vimto ,一般来说直接用左上角的库名,也就是laurenkt/zsh-vimto就可以了,但具体还是要看文档:
antigen bundle laurenkt/zsh-vimto
然后就可以把这个文件放到版本库或者云端保存了,以后到新的机器上就很省事了。
下面介绍一些好用的插件:
z
安装:
antigen bundle z
使用:
访问过的路径会根据使用频繁程度排序,例如经常进入ios和ios2路径,其中ios2比ios更频繁,那么:
z i
将会切换到ios2下。
vi-mode
安装:
antigen bundle vi-mode
使用:
命令行内操作可以用vi指法。例如输入了这么一行指令:
find . -name "*.el" | xargs cat | grep -v ^$ | wc -l
现在我想把el修改为py。如果没有vi-mode就麻烦了,需要各种ctrl-b然后再修改。用vi-mode之后,操作是这样的:
- Esc 此时窗口最右侧会出现 <<<(如果安装了zsh-vimto,则显示一个NORMAL)
- F. 此时光标移动到了.el的.上
- lxxipy 修改完成
- Enter
zsh-autosuggestions

- 安装:
antigen bundle zsh-users/zsh-autosuggestions
- 使用:
将会根据输入显示最后输入的命令,c-e补全。
fast-syntax-highlighting
- 安装:
antigen bundle zdharma/fast-syntax-highlighting
更好的高亮支持。
history-search-multi-word

- 安装:
antigen bundle psprint/history-search-multi-word
- 使用:
更好的c-r支持。有列表提示,且可以用空格进行关键词的增加。c-r/c-n 下一条;c-p上一条。
zsh-interactive-cd
- 安装:
先brew install fzf
antigen bundle changyuheng/zsh-interactive-cd
- 使用:
交互式的cd。
zsh-vimto
- 安装:
antigen bundle laurenkt/zsh-vimto
- 使用:
更好的vi指法支持。
最后
其他alias之类的烂大街的东西就不写了,之后应该不会再这么集中的折腾终端了。
以上。